Title: Struggling with Thermostat Replacement on Suzuki Lapin Turbo CVT Model (CBA-HE22S K6A+CVT During Coolant Leak Repair)
Coolant leaks from radiators frequently occur during winter.
In both summer and winter, coolant temperature rises to around 90°C, but the greater temperature difference in winter puts more stress on the radiator tank joints.
2009 model, CBA-HE22S, K6A turbo, CVT, 4WD, mileage: 135,000 km
When the vehicle was brought in for inspection due to a strong coolant smell, the coolant leaking from the radiator’s upper tank had already progressed to the point where it was dripping to the underside of the vehicle.


The radiator itself can be pulled out from the bottom of the vehicle without removing the front bumper, though it’s a bit like solving a puzzle.
The coolant leak was caused by a crack near a slightly raised area on the radiator’s upper tank.
Since the vehicle had over 130,000 km, I arranged to replace the thermostat at the same time, which had never been done before, but faced unexpectedly difficult work.
I had replaced thermostats on Suzuki FF kei cars with K6A engines several times before and didn’t remember any particular difficulties, but I was surprised when I removed the intercooler and saw the component layout around the thermostat.
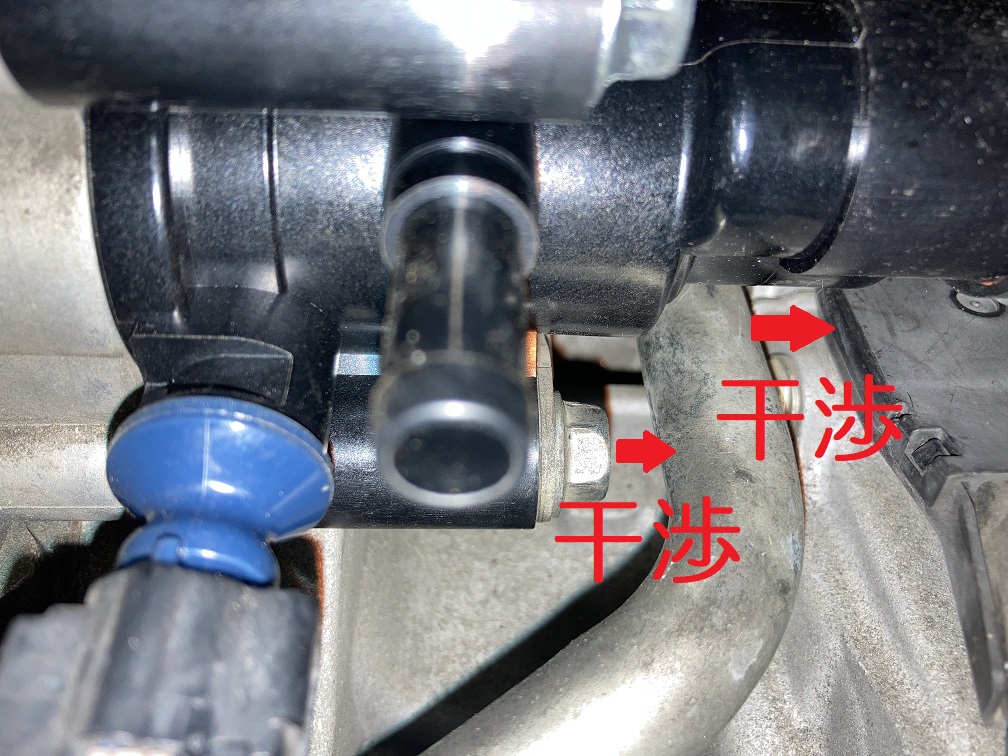
The resin housing thermostat assembly commonly seen in recent years is fixed with three bolts: two long M8 stud bolts and one regular M8 bolt. To remove it, you need to slide it horizontally by the length of the stud bolts.
However, even the lower M8 bolt interferes with the heater pipe, and the harness lying on top of the CVT makes it difficult to remove the heater pipe easily (this photo was taken after replacing the thermostat, as there was no time for photos during the work).
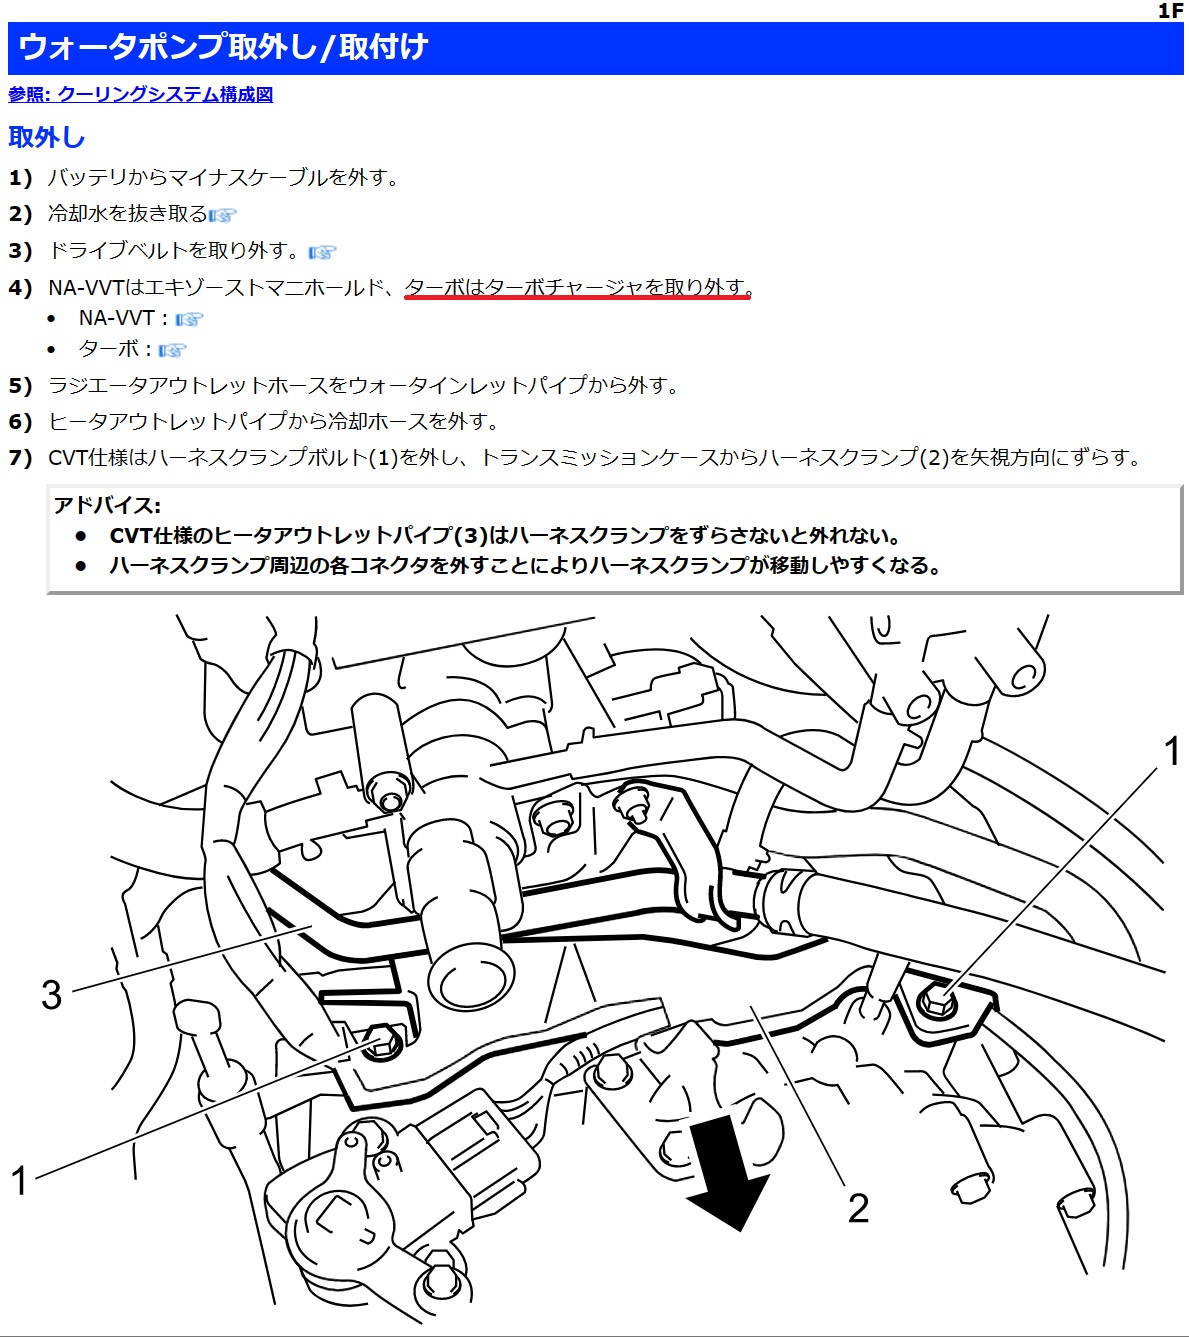
Checking the service manual, it states that for CVT models, the heater pipe must be removed to take out the thermostat.
The shape of the CVT’s upper section differs greatly from the same engine with conventional AT or MT, so the heater pipe routing is different.

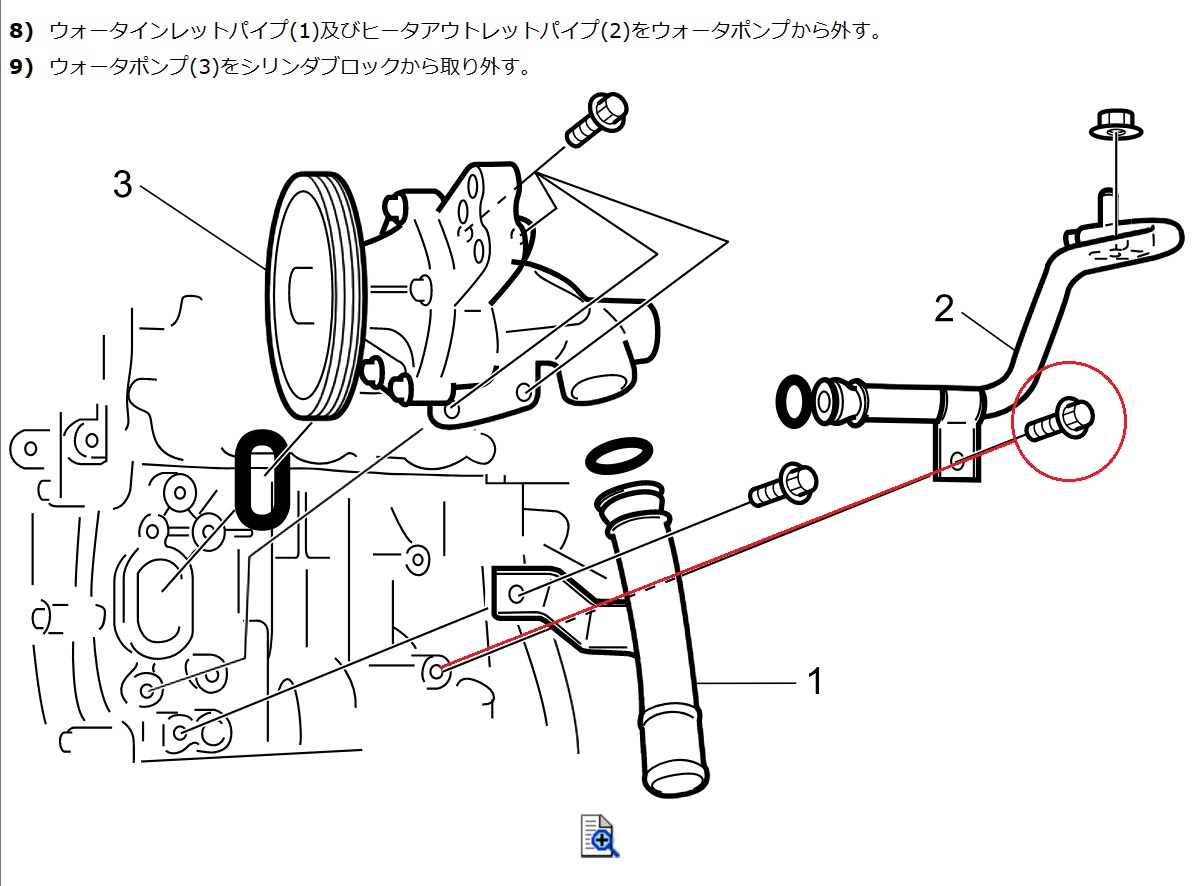
The long, curved heater pipe runs along the side of the cylinder block to the water pump, and is bolt-secured somewhere behind the turbocharger.
As expected, the manual instructed to remove the turbocharger.
Having to remove the turbocharger just for a thermostat replacement is quite daunting.
Many bolts around the turbocharger are difficult to remove due to the effects of de-icing agents and exhaust heat. This is the kind of job I’d prefer to tackle with full commitment when replacing the turbocharger.
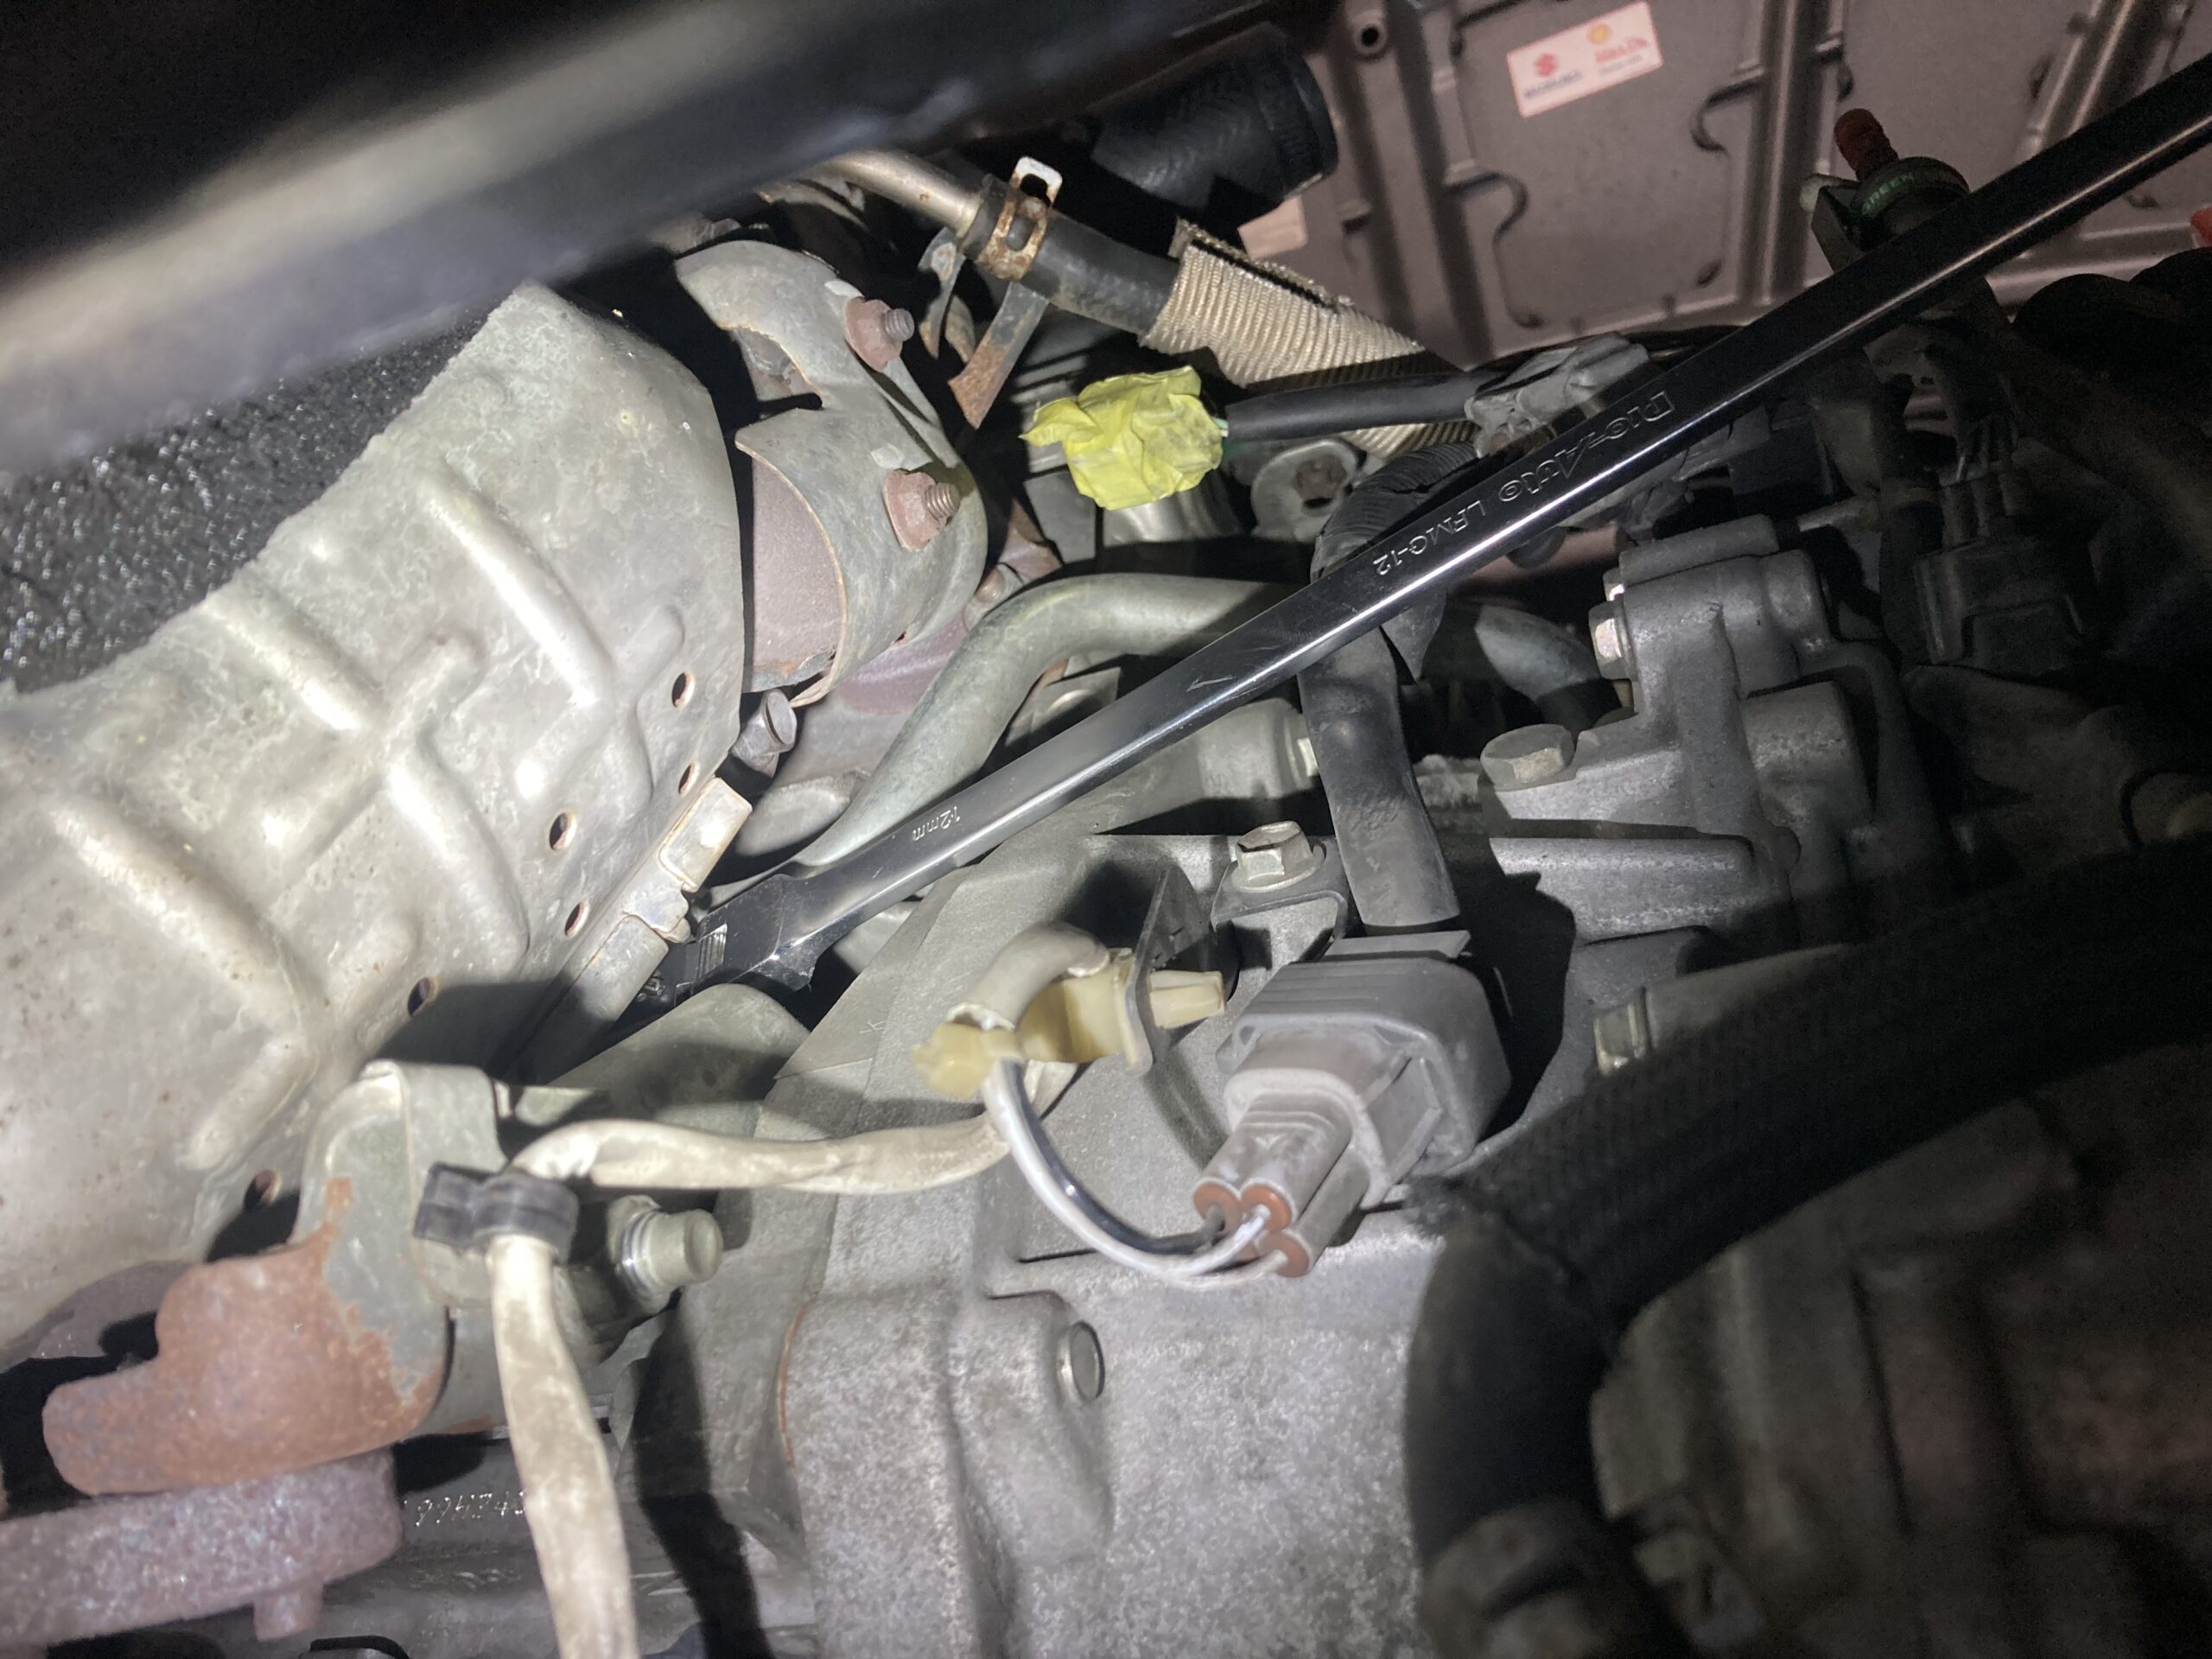
The target bolt is barely visible from under the vehicle. From experience, bolts that can be even slightly seen or touched can usually be removed, so I tried various tools.
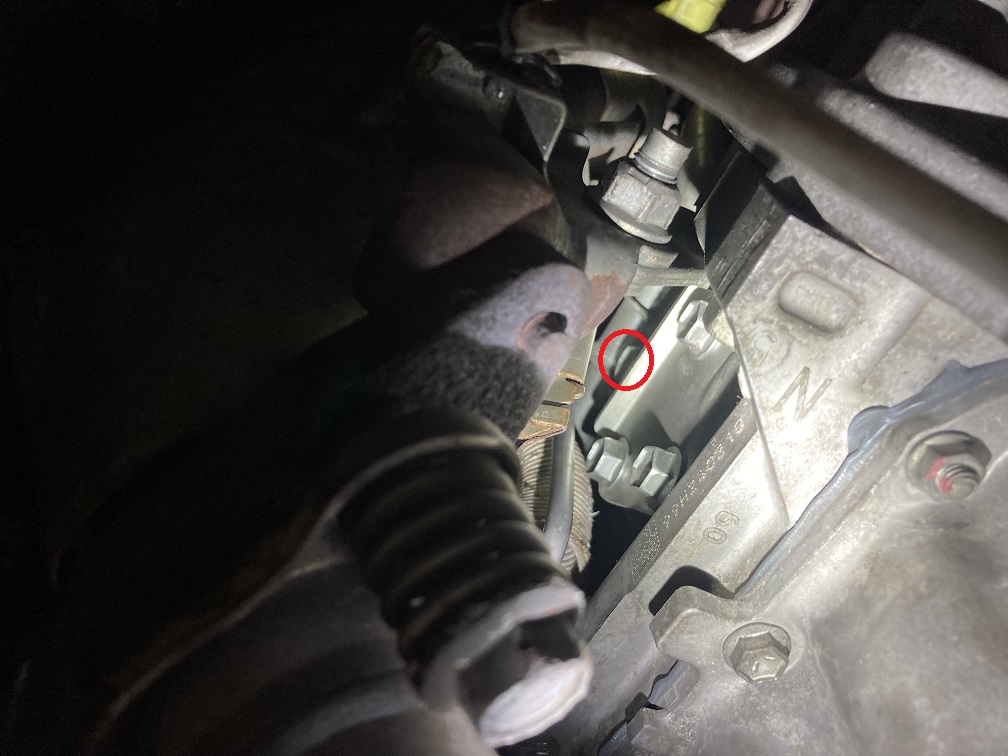
This time, since the space where the radiator sits was wide open, my right arm could fit in, allowing me to comfortably maneuver a long flex wrench at this angle.
However, the location where this bolt is installed is so narrow that only the tip of a fully extended finger can barely touch the bolt head. There’s no space to pinch and turn with fingers.
While removal is easy, for installation, I had to approach the target hole carefully using adhesive tape or magnets on my fingertips.
Aligning the hole in the heater pipe with the female thread in the cylinder block is literally done by feel, and it takes intense concentration to get the first thread of the bolt engaged.
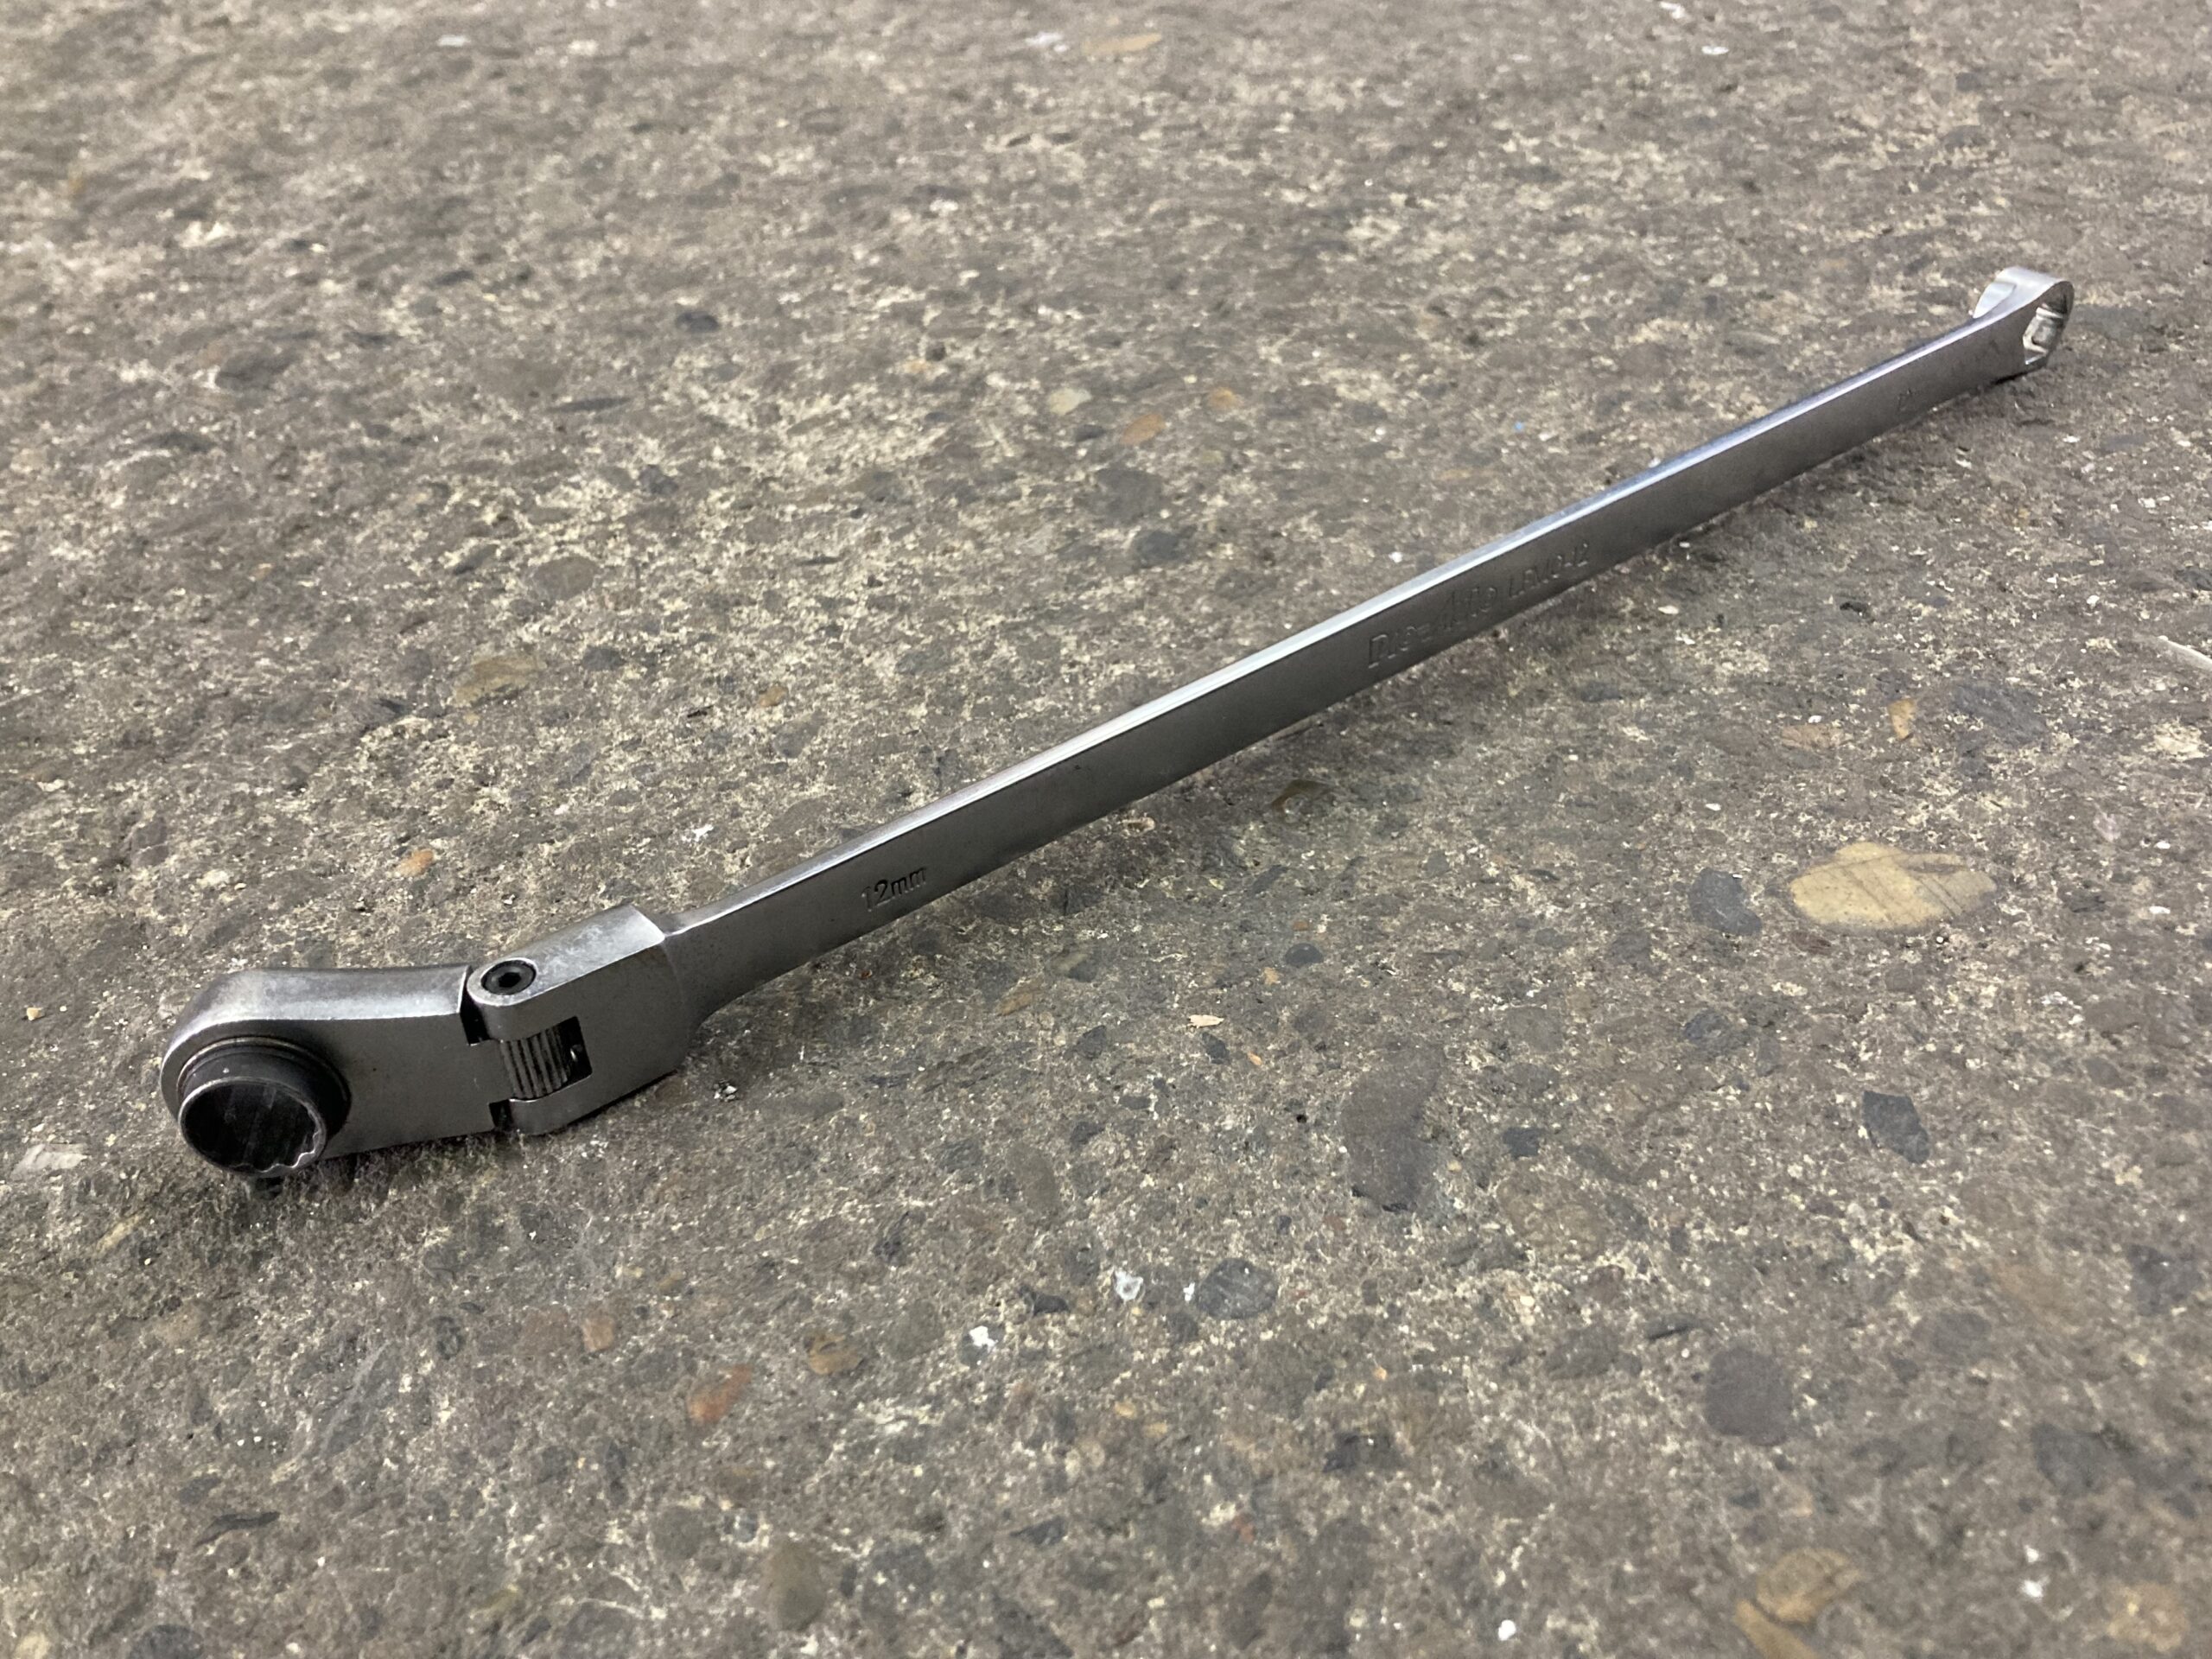
As an aside, ratchet wrenches with “flanges” like this are convenient because the area around target bolts is often surrounded by reinforcement components.
TONE Super Long Pivot Head Ratchet Wrench RMA-12L 12mm width
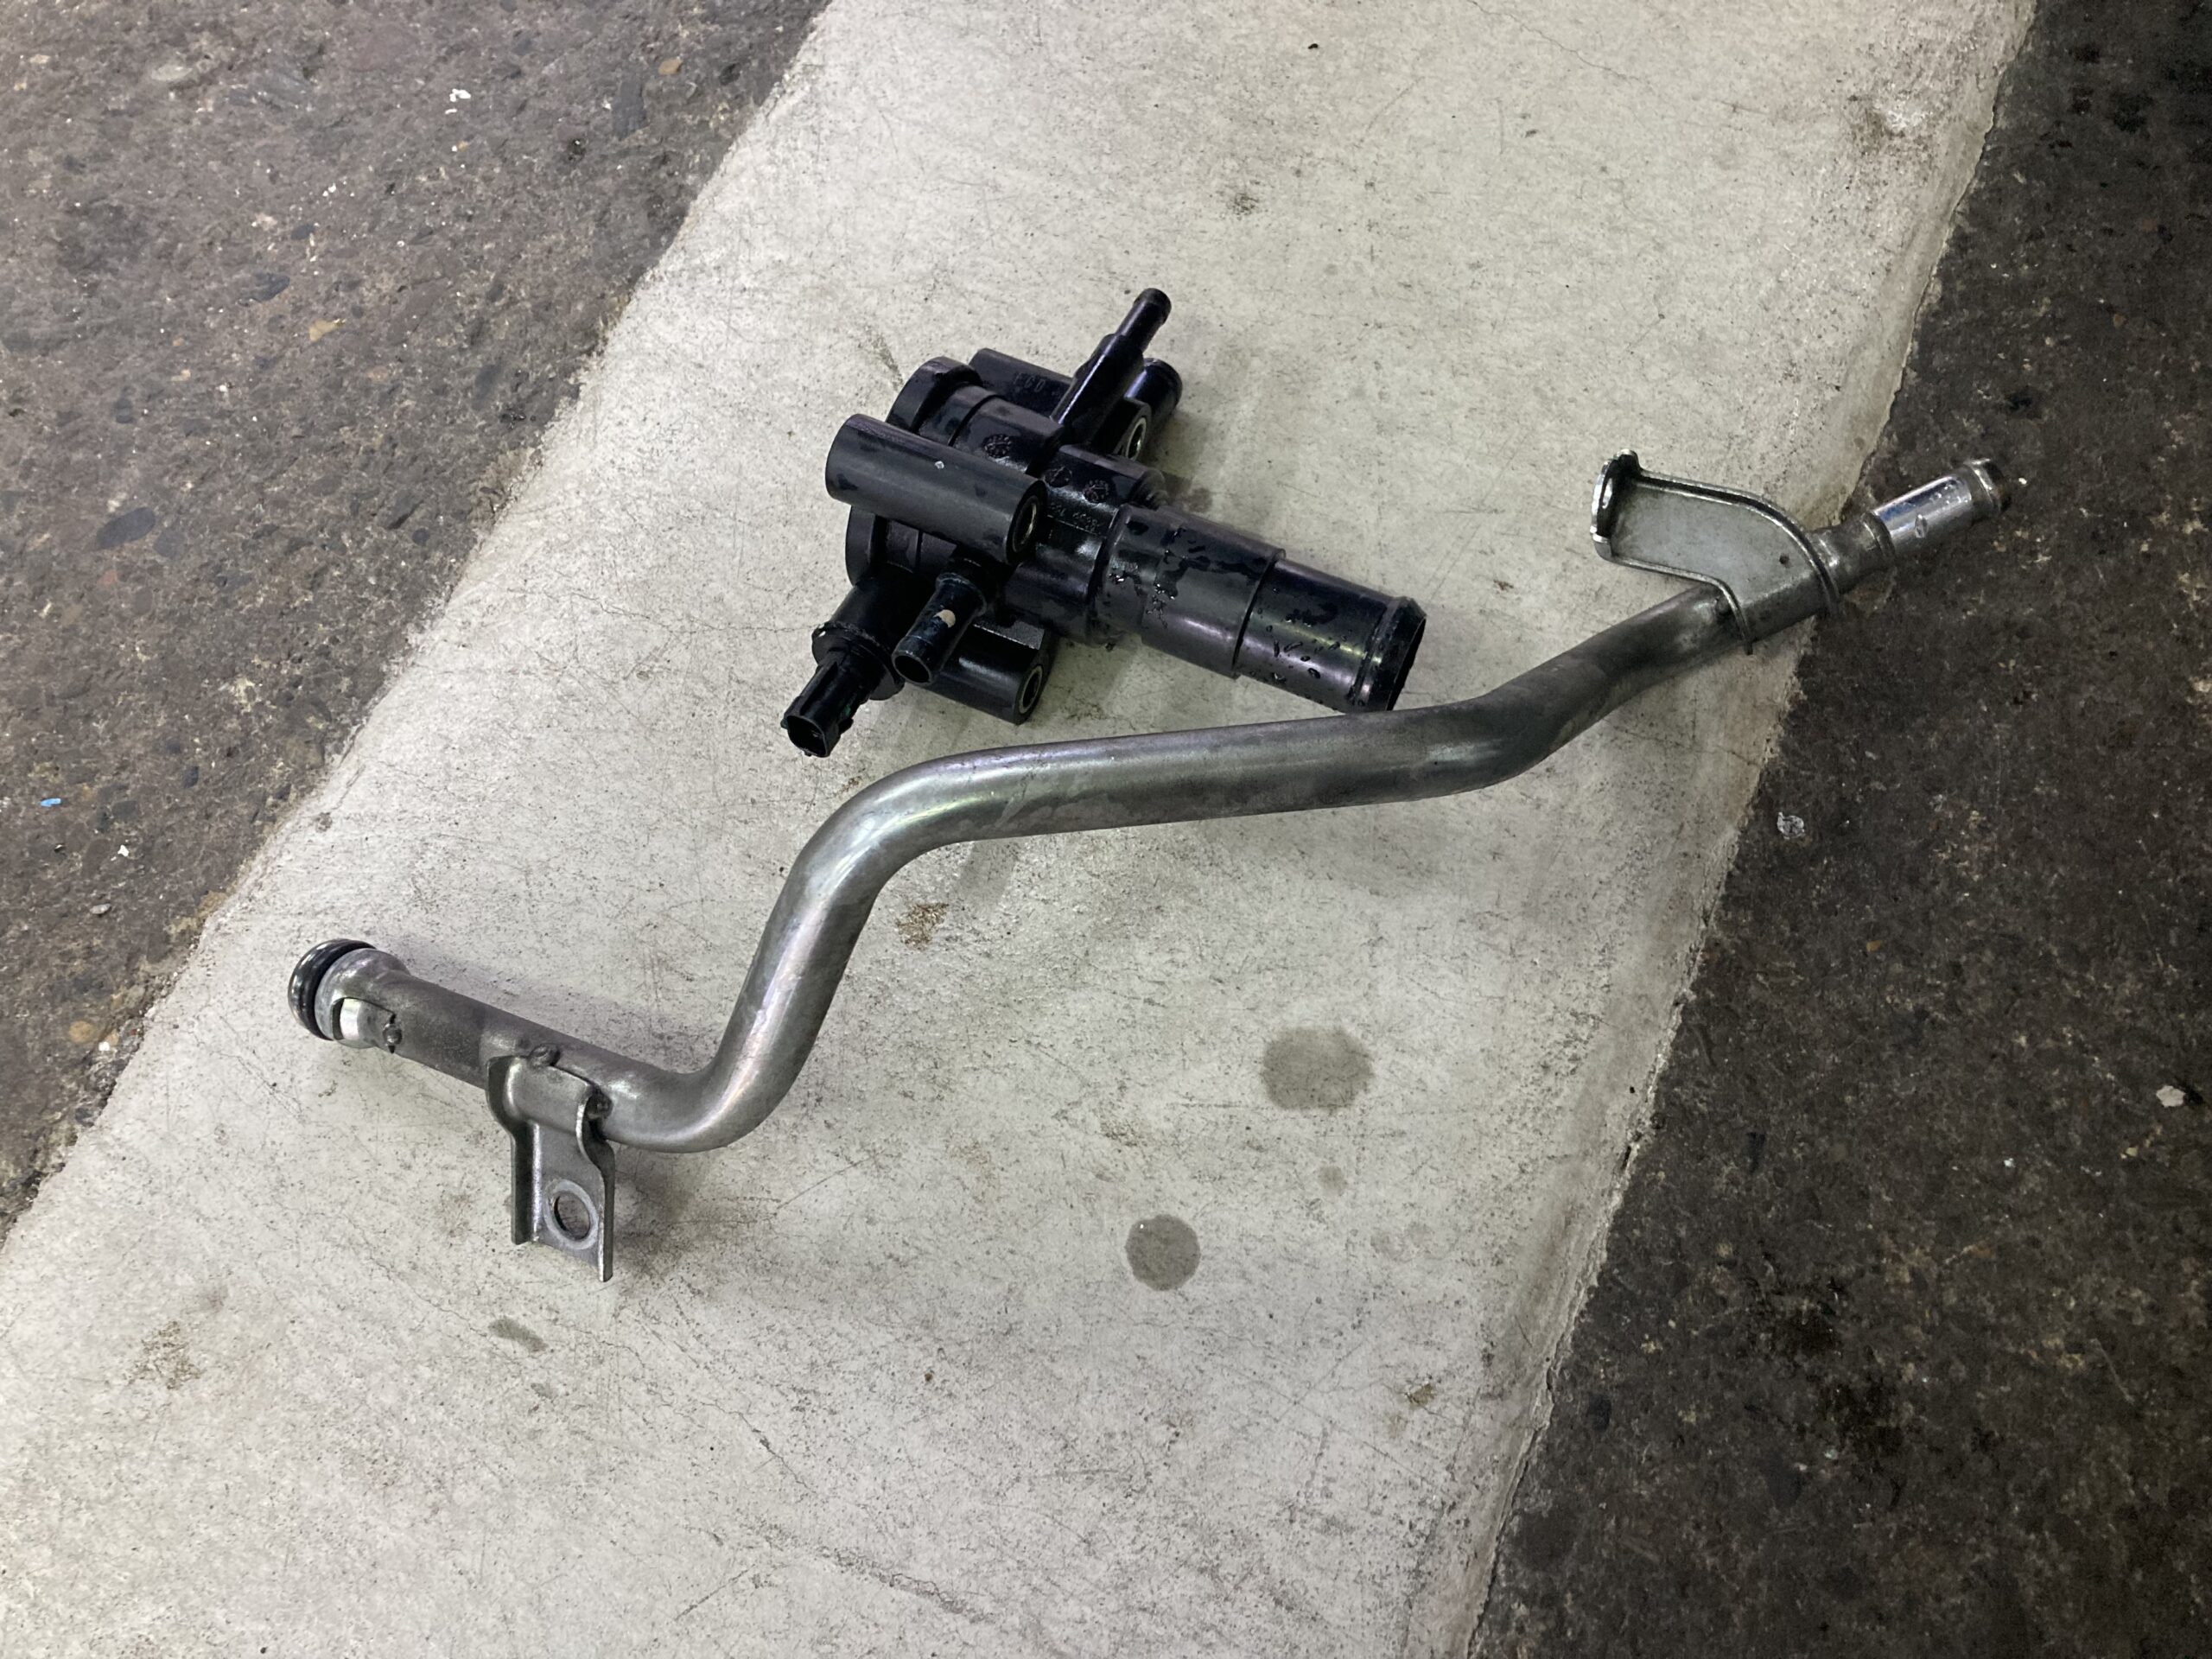
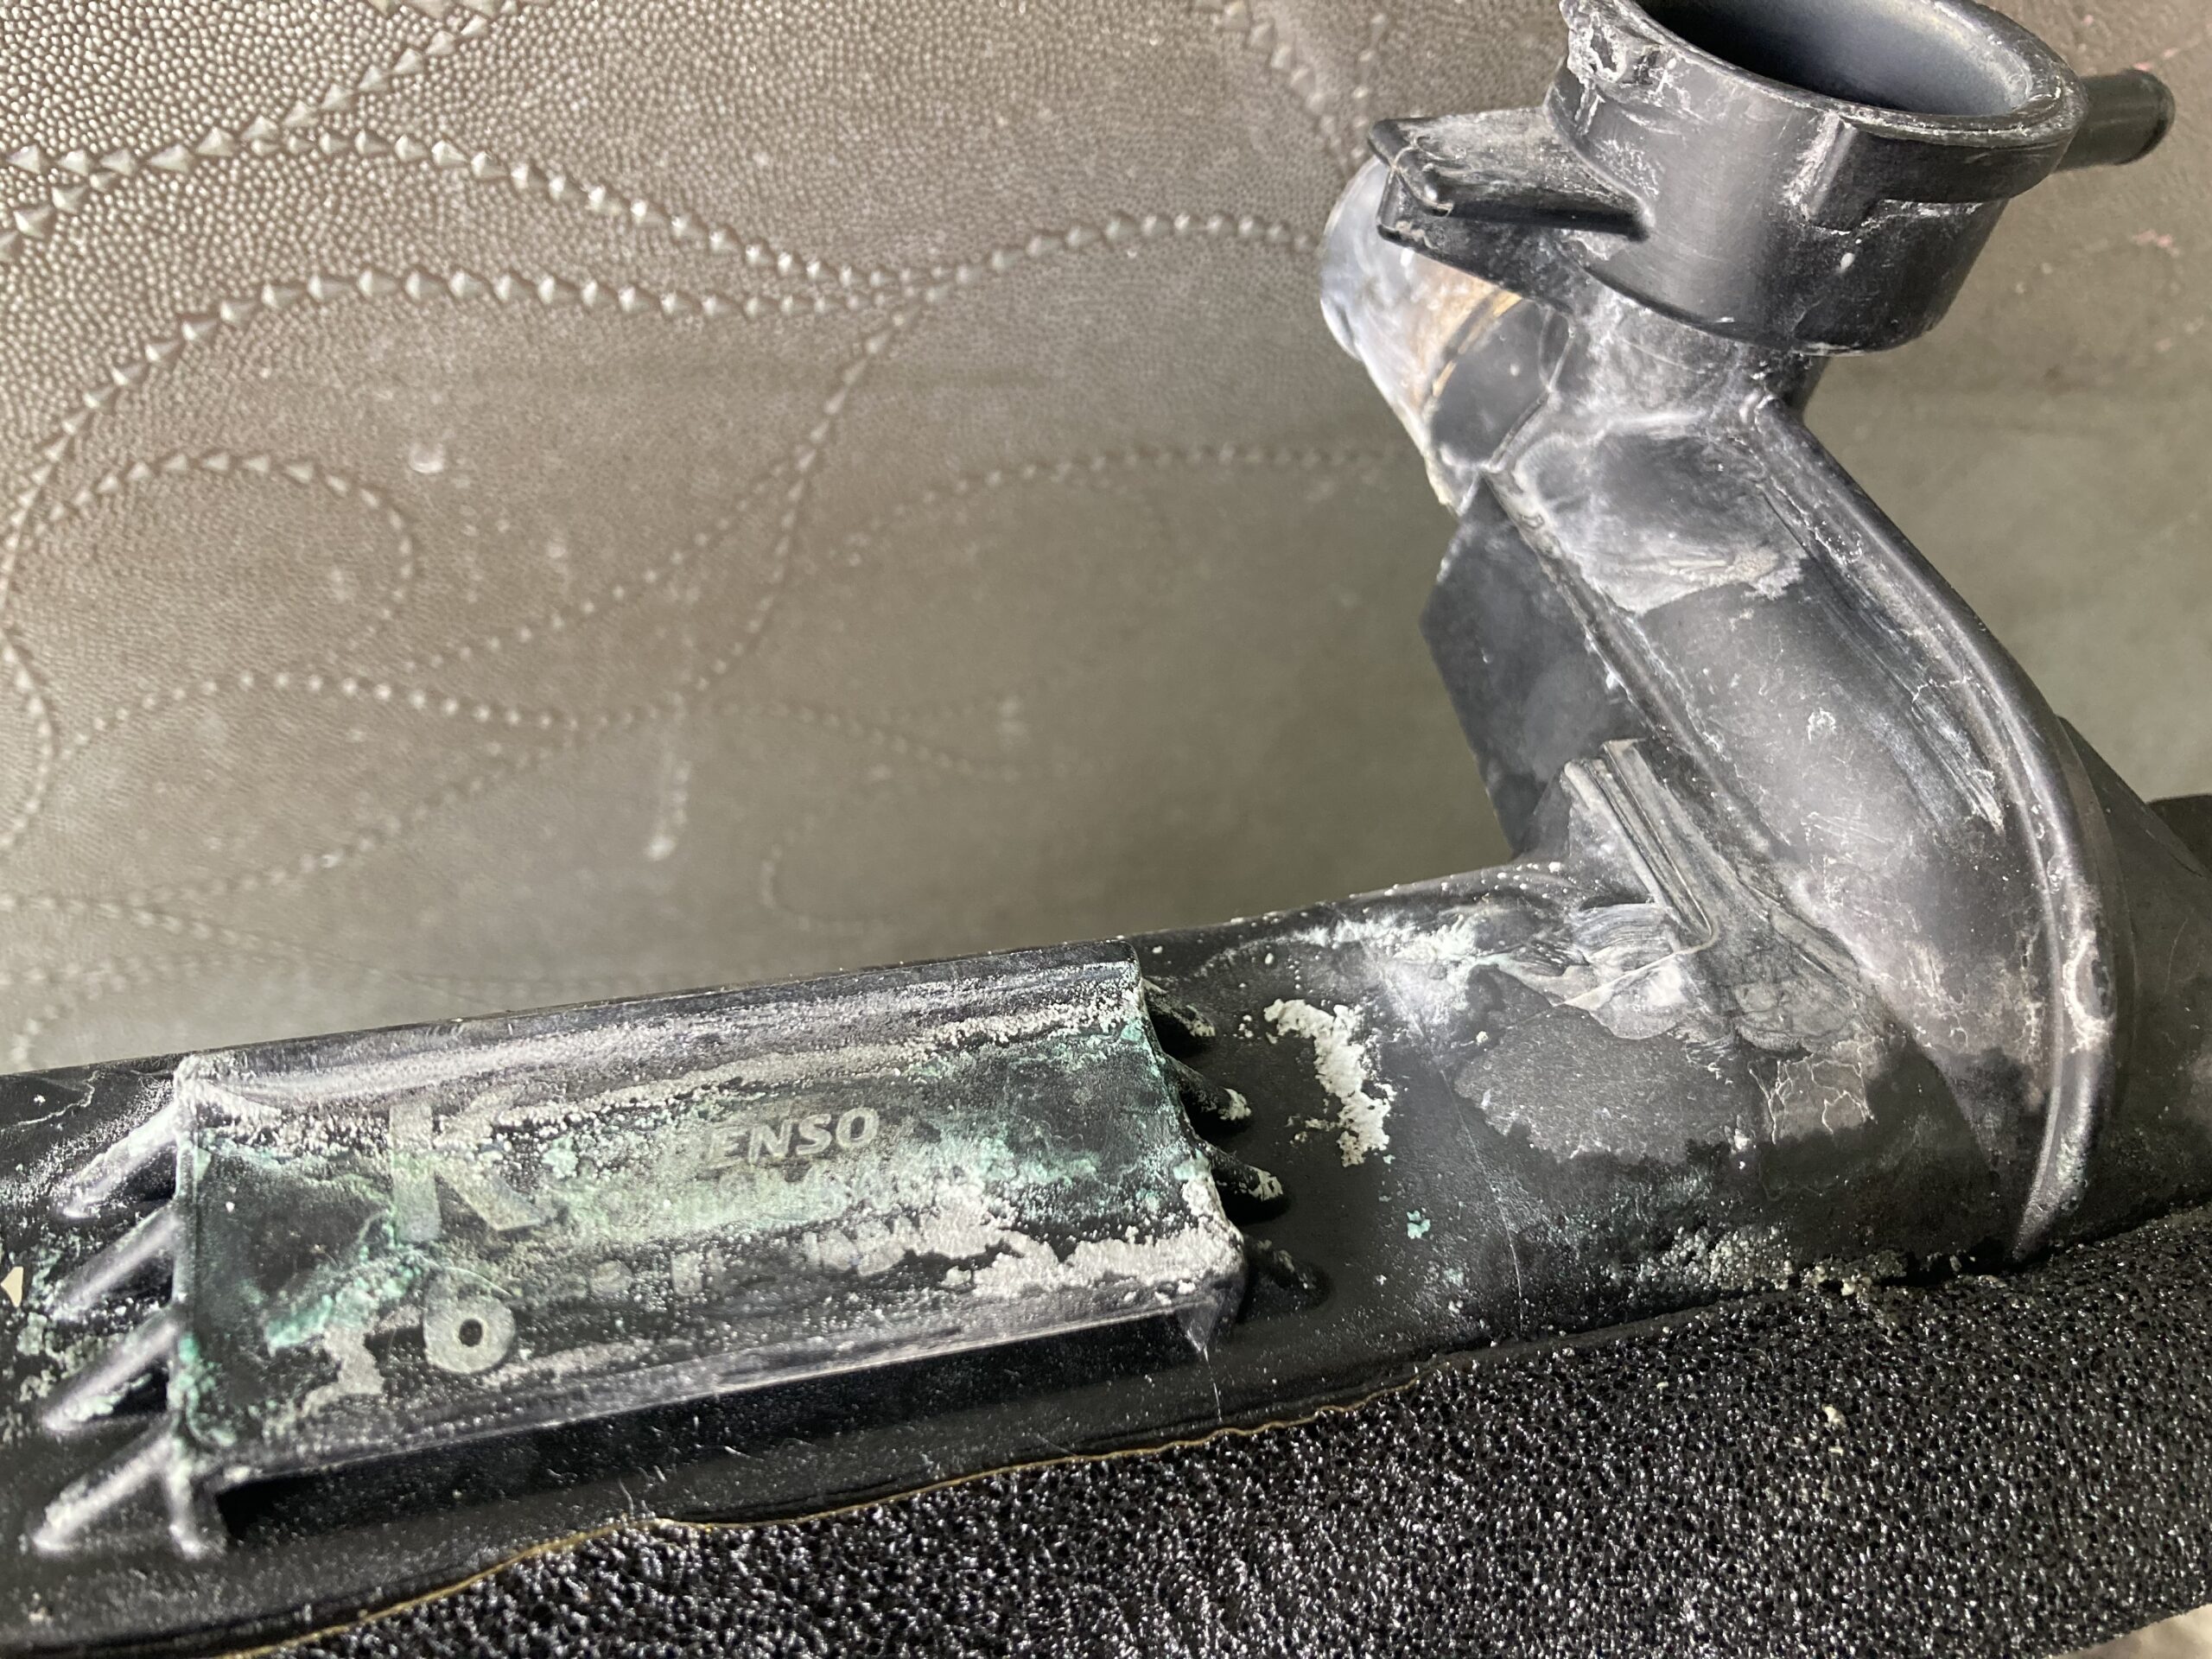
The photo below shows the thermostat housing after removal:
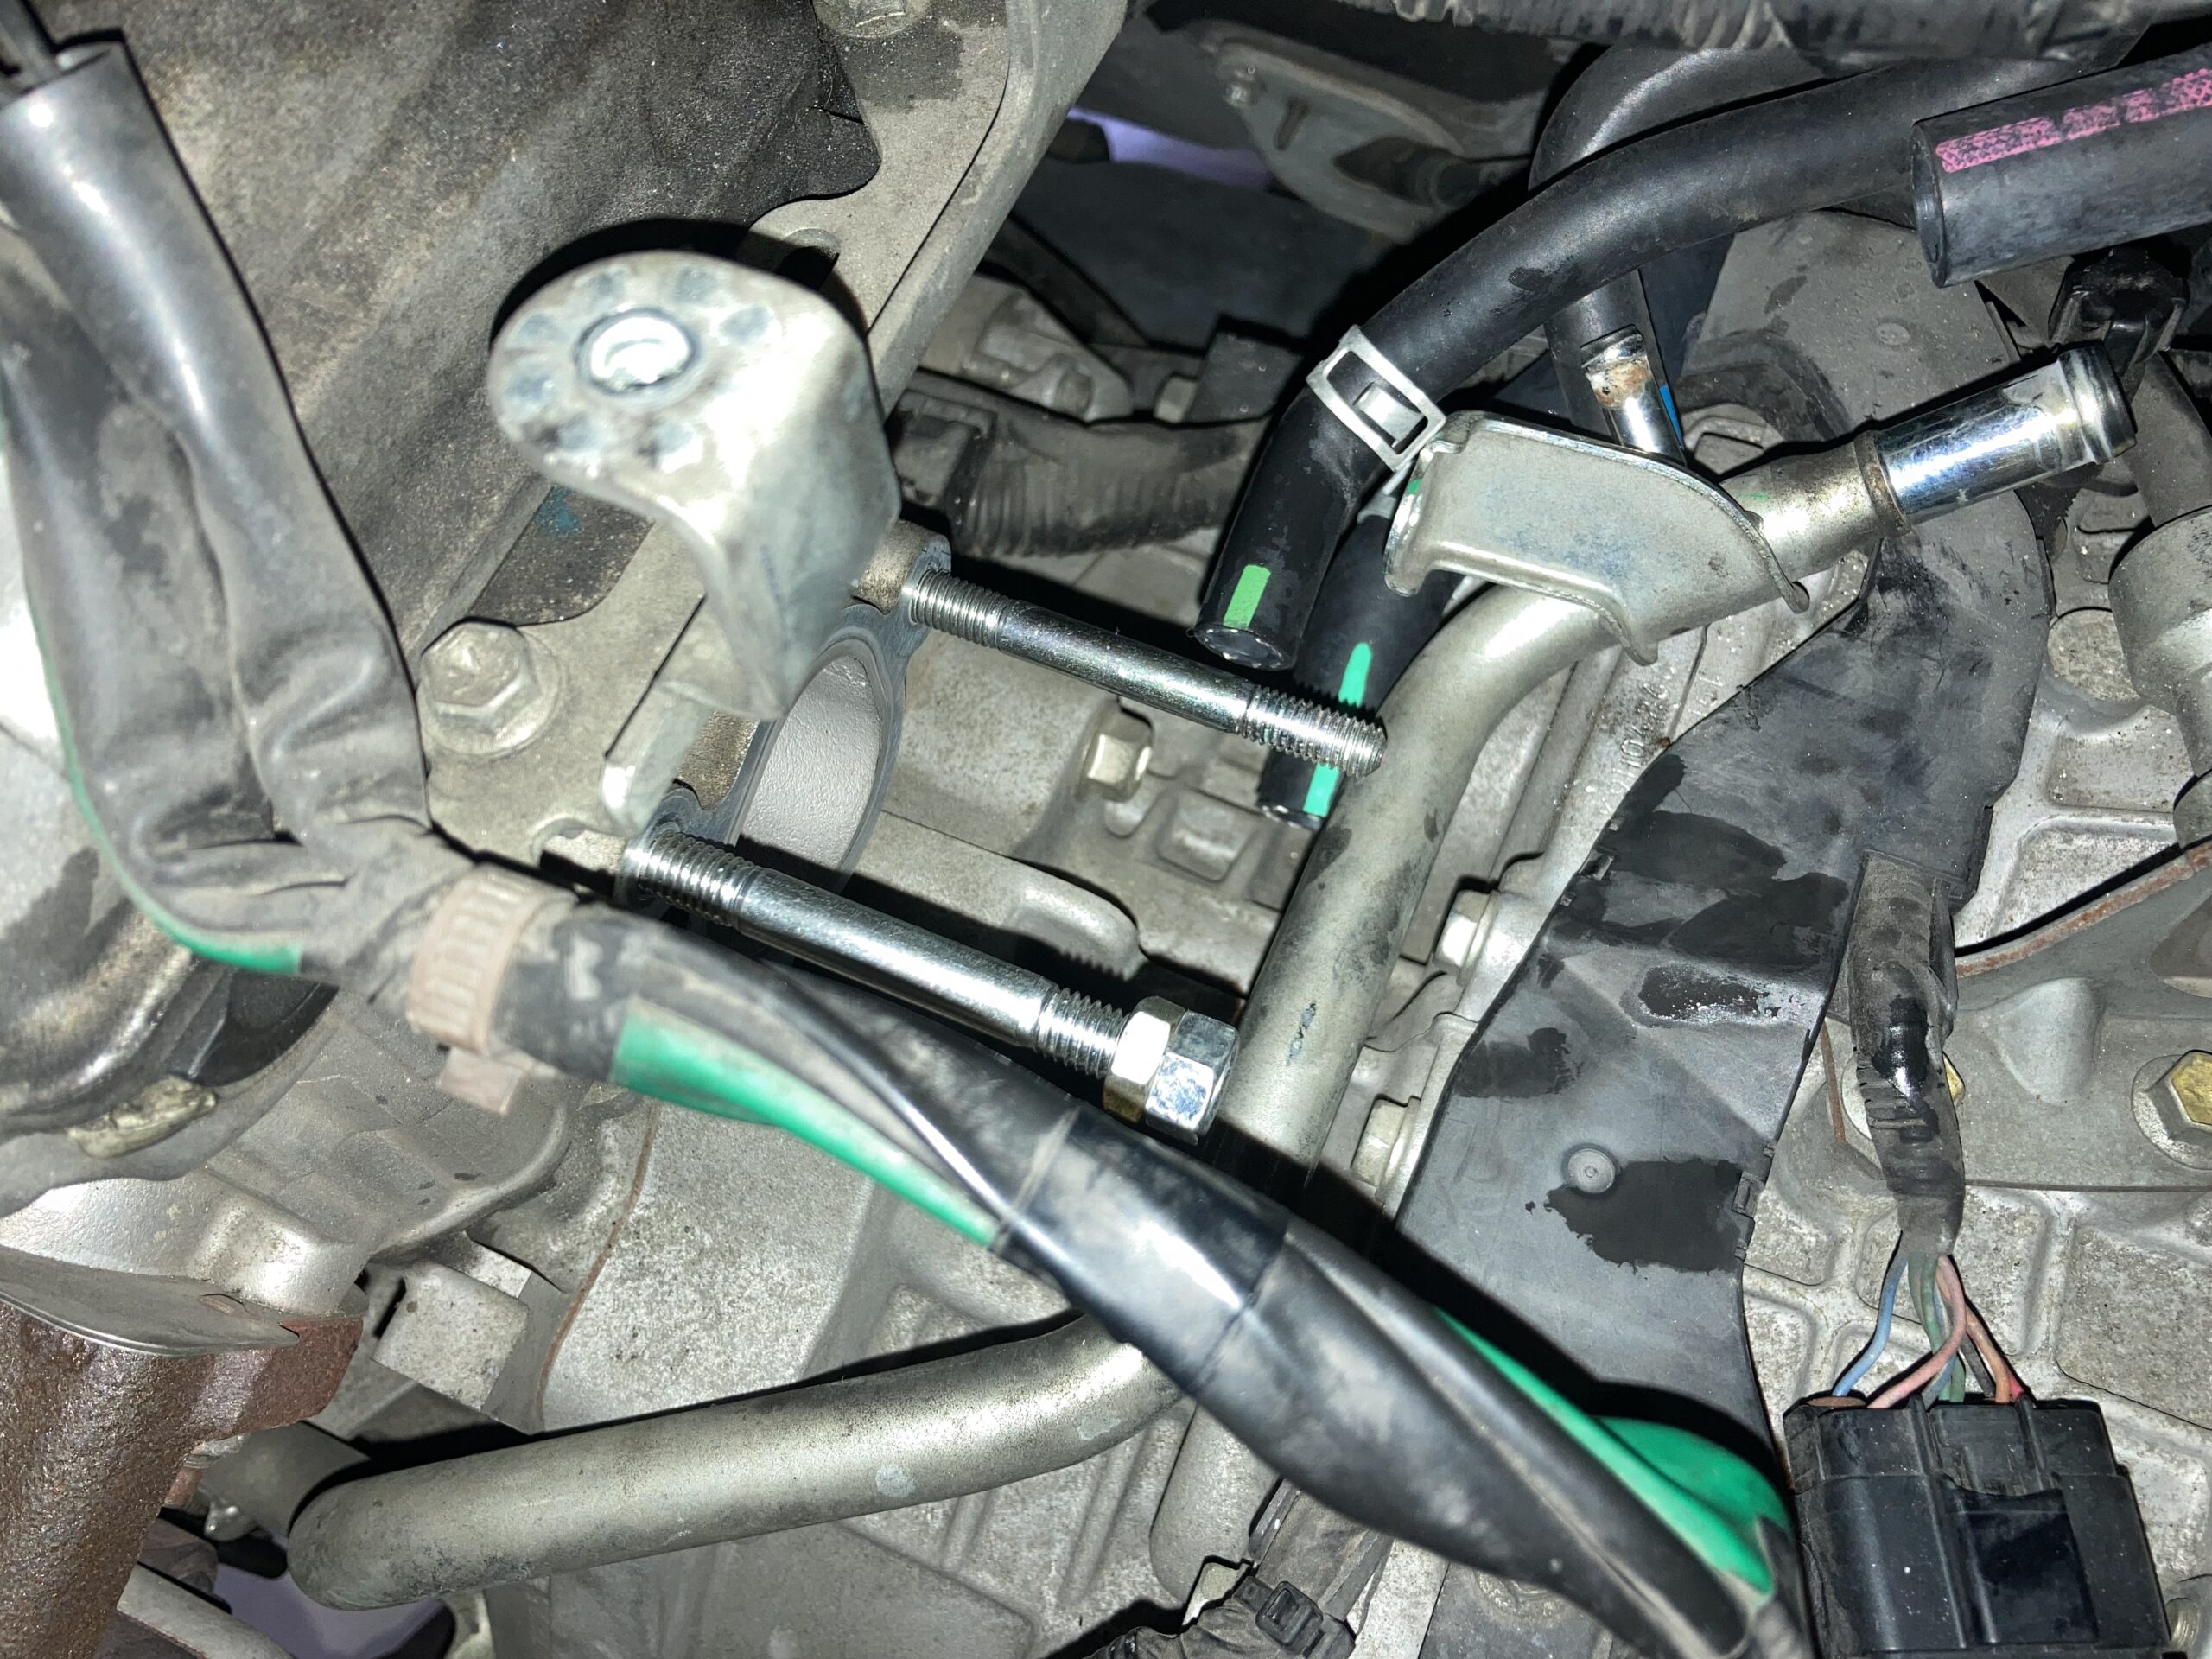
The thermostat housing is secured with long stud bolts as shown. Work efficiency would significantly improve if the stud bolts were removed using double nuts or similar methods while the thermostat housing is still attached.
This way, I was able to successfully replace the thermostat housing without removing the turbocharger. By removing the stud bolts, there was no need to move the CVT harness either.
Also, once hoses have been removed, they have a higher risk of leaking, so I generally don’t reuse them.
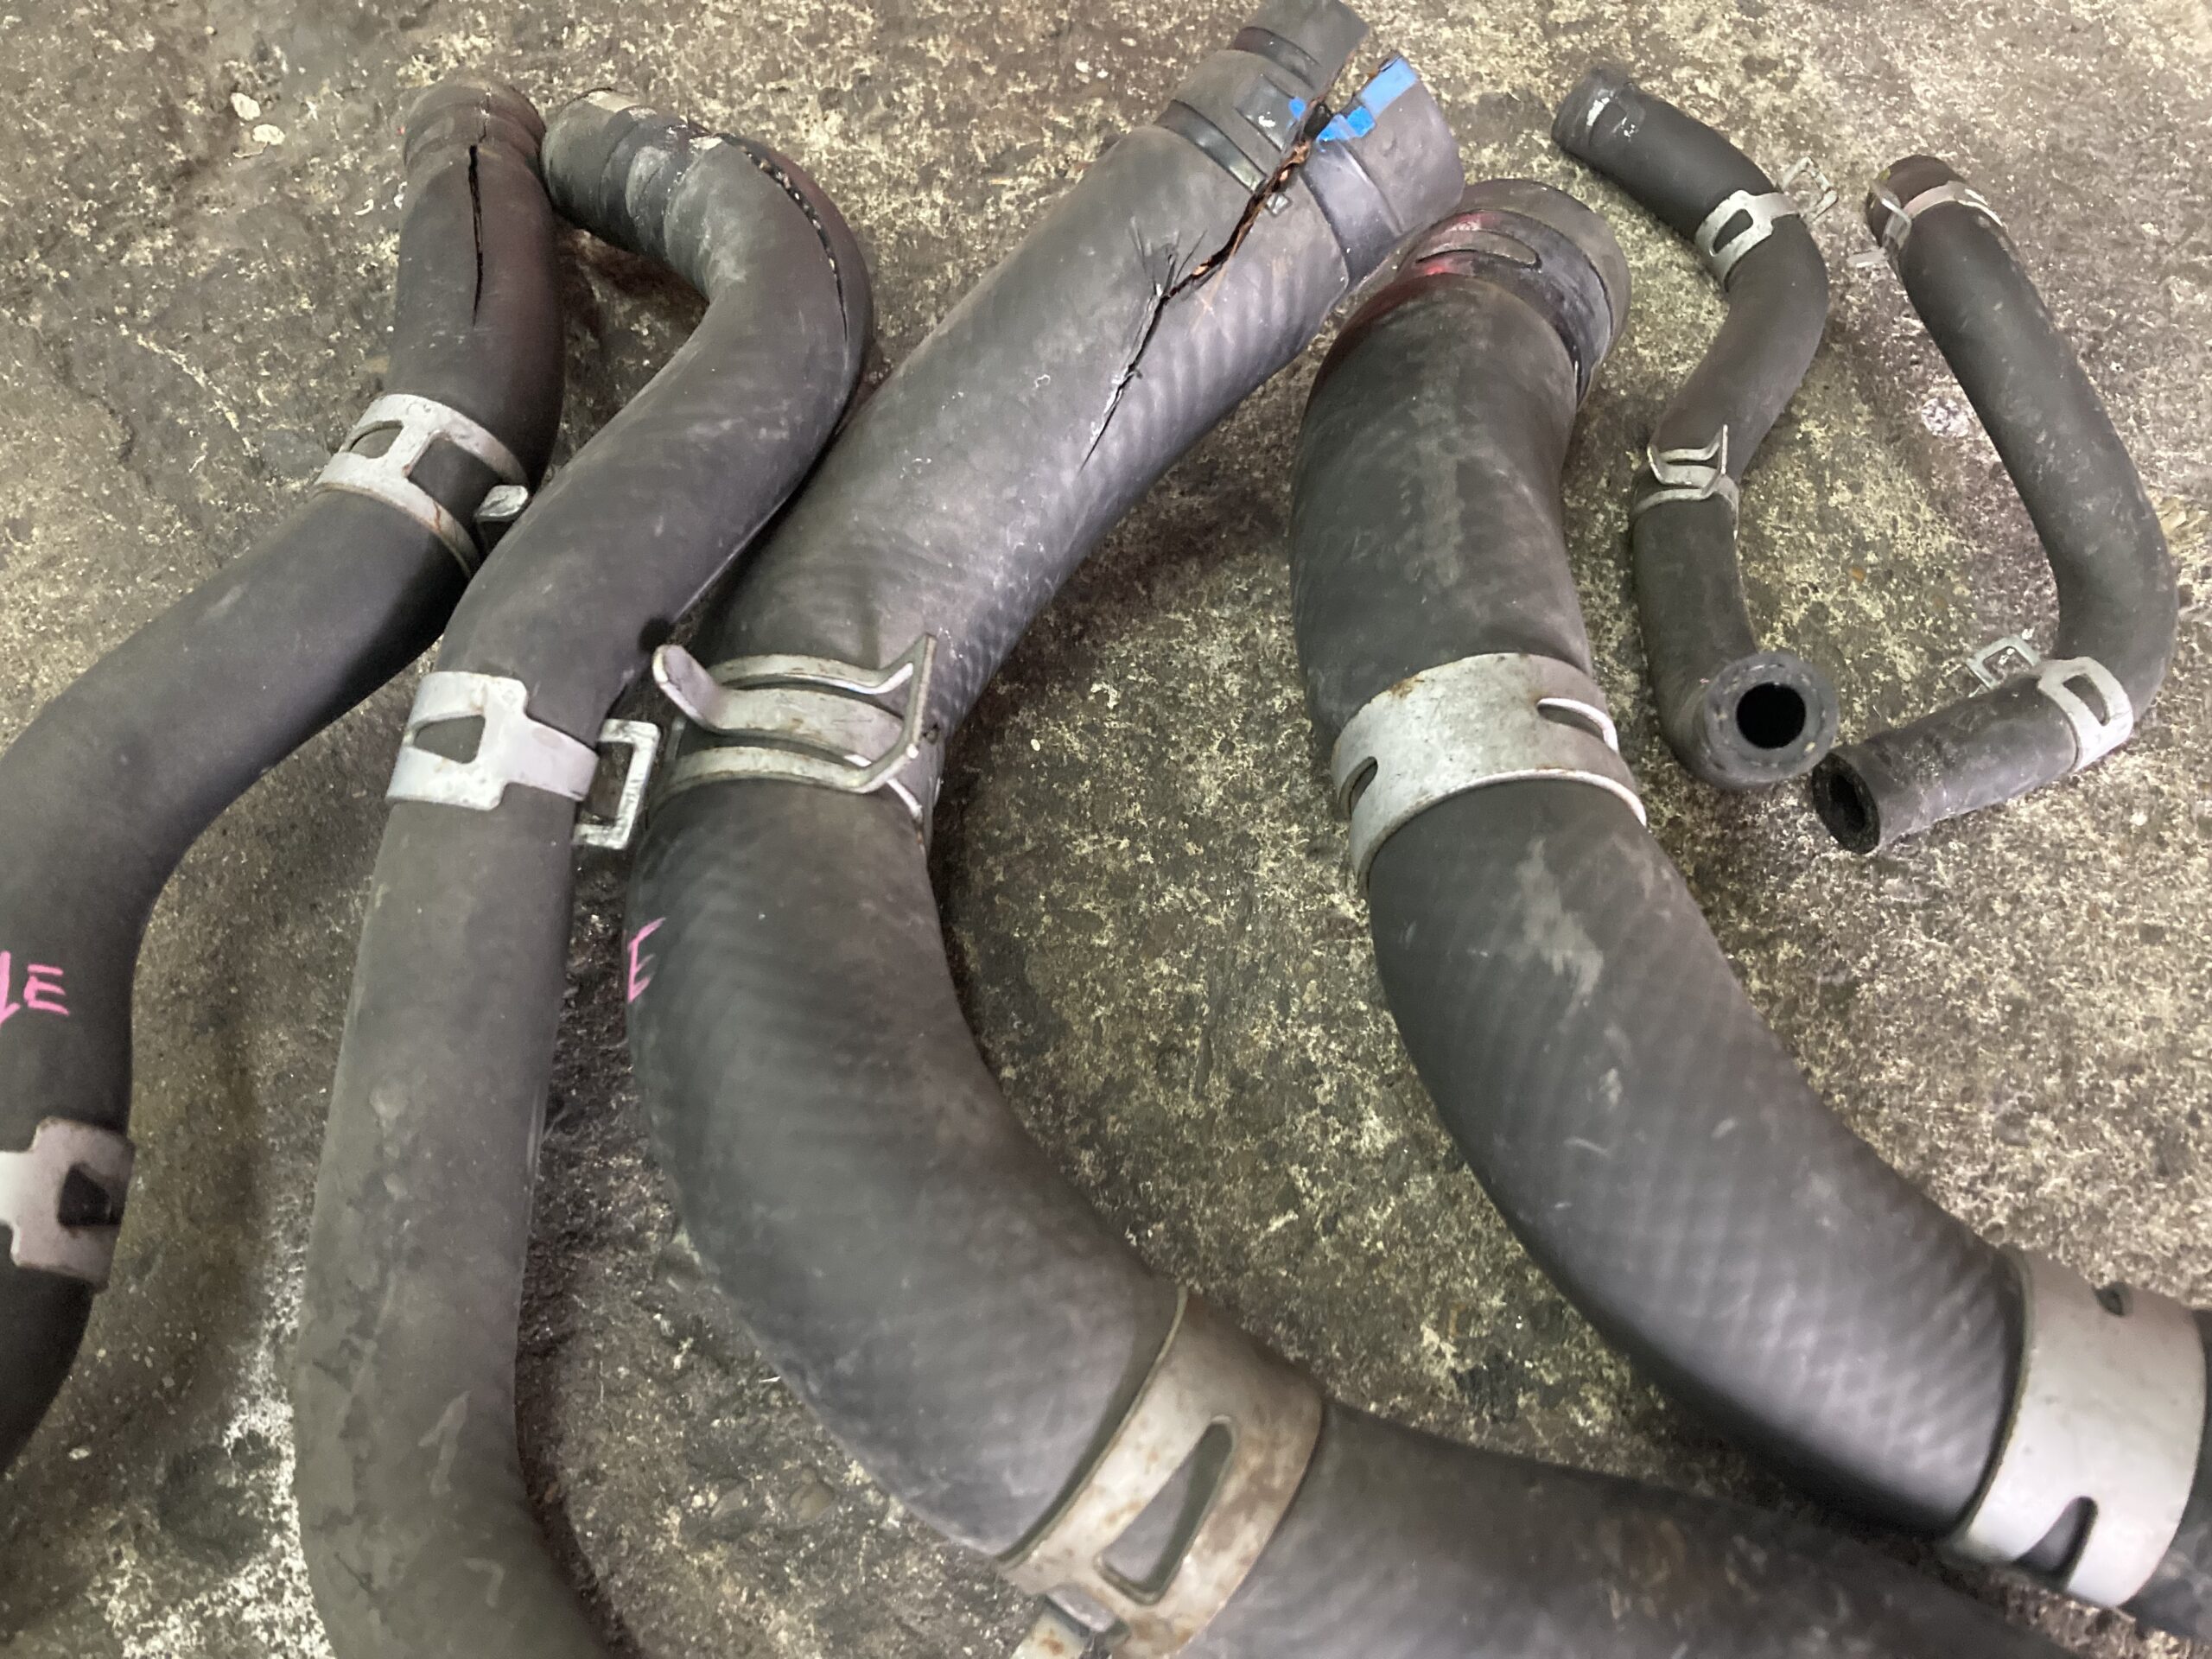
Water hoses typically stick to their fittings.

For the old hose, I made incisions with a cutter like this and inserted a hose remover into the cut in the direction of the joint.
Then, by deepening the cut with the cutter, I was able to cleanly separate it without damaging or deforming the pipe.
I think replacing the thermostat on a K6A+CVT would be very difficult as a DIY project, but I’ve compiled this article with the maintenance procedures many have requested.
Leave a Reply